
 int int
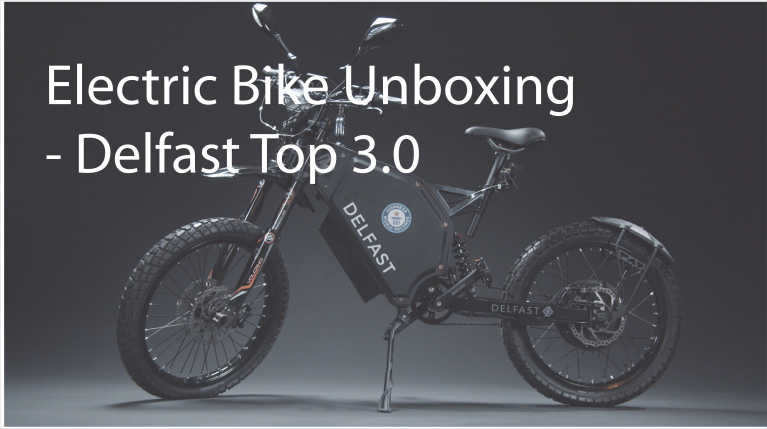
So, you finally got the box containing your new Delfast Top 3.0. Congratulations! It was a long waiting time, wasn’t it? But it surely was worthy. Now, after more than a couple of months, your electric bike is finally by your side. Can you believe it? It is there, inside that big box!
You must be very impatient to start riding your premium ebike. It’s understandable. You will love it. Also, your friends and acquaintances will be impressed by such a fine piece of engineering. But before you can ride your new Delfast Top 3.0, there is a little bit of assembly to do. Don’t worry. They are very simple tasks, namely:
We did our best to ease the process of buying an ebike. We also make the assembly easier. Therefore, we have made a Delfast Top 3.0 unboxing video. If you prefer, you can follow the written instructions below. After a few minutes, you’ll be ready to conquer the road and off-road with your new electric bicycle.
Open the box carefully. Take out all the small boxes inside as well as the bicycle. Make sure you take everything out.
Install the Battery
With the aid of a screwdriver, remove the lid on the left side of the e-bike. Then remove the metal plate that covers the battery cavity. Place the battery beside the e-bike and connect the cables as indicated in the manual. Now, carefully place the battery in its place. Beware, the battery is heavy.
Before you ride your e-bike for the first time, you must fully charge the battery. Always use the Delfast charger. Using a different charger may cause permanent damage to the battery. Once the battery is installed, place the metal plate and the lid back.
Verify the pressure of the tires. You can do it with the aid of a barometer. Check in the manual what the correct operating pressure should be.
Remove the screws of the clamps and the nuts that hold the axle in place. Remove the axle half the way such that the wheel can be positioned in its place. Then, pass the axle through the hole of the wheel and secure both sides with the corresponding screws of the clamps. Finally, tighten the wheel axle nuts.
Next, take the front line out of its box. You have to install it in the front part. Tighten the two little screws that fix it to the frame.
Once the front light is in place, you must install the front mirrors. Take them out of their box and place each on its corresponding side. Installing them is straightforward. Just screw them on their corresponding places.
Adjust the height of the seat and place the decals on the lid of the battery. Your e-bike is now ready. Turn it on. You’re ready to ride!